Paint a landscape Van Gogh style in acrylics
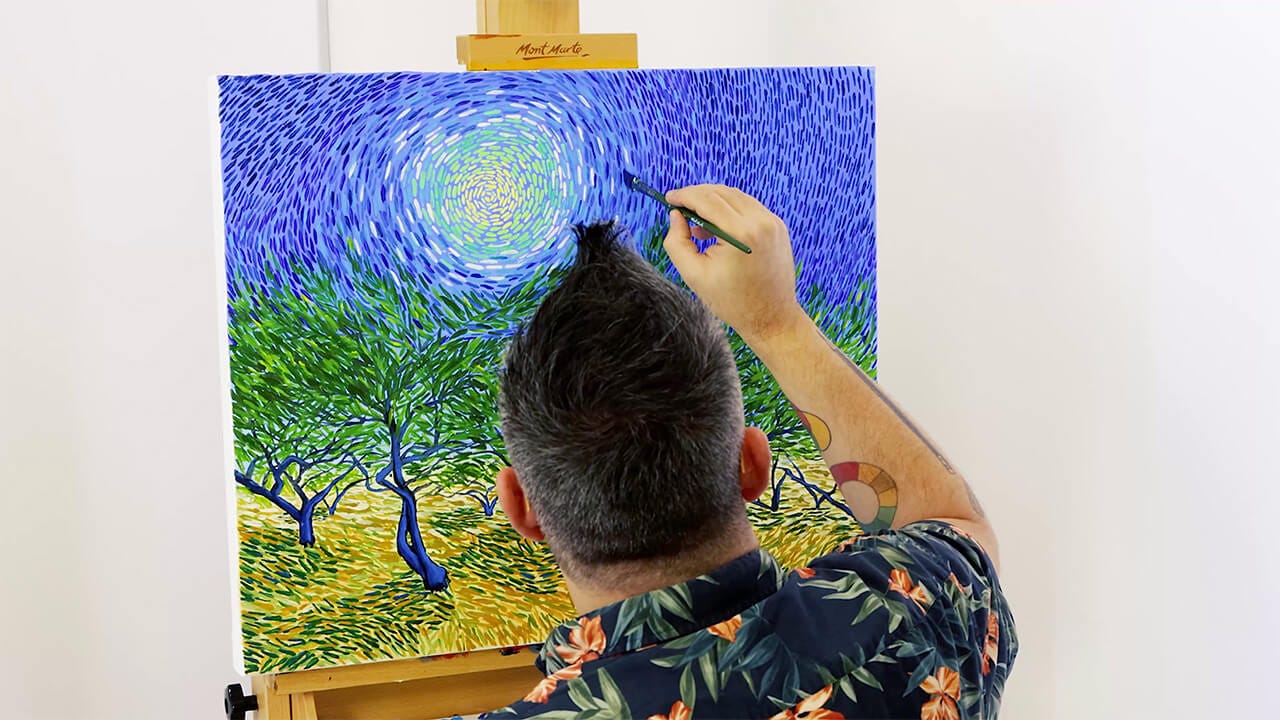
In this tutorial, follow along as we paint a landscape Van Gogh style in acrylics. We'll explore pattern techniques and will touch on some of the materials Van Gogh would have used. If you’re ready to dive in, you can find the full step by step guide and video below.
Extra materials you’ll need:
- Paper towels
- Water
- A HB pencil
- A rag
The first step is to draw the rough positioning of each tree on the canvas using a HB pencil. Lay in the branches as well as they give an idea of where to place the leaves when it comes to that stage. We have supplied an outline and image of the finished work to use as reference. You can find them under “Resources” on the lesson webpage.

Once the trees are drawn in, lay Black over the drawn leaves with an angle brush. At this stage, you can refine and add any extra detail. When painting the branches use the edge of the brush.

Once the black paint is dry, lay in some Cobalt Blue and Titanium White into the background. A palette knife is used to get the paint on quickly. As acrylic paint is fast drying, you can use a damp rag to consistently spread the paint across the canvas. Use strokes in a circular motion from the central point of the sky.

Lay in the foreground using Raw Sienna, Lemon Yellow and Titanium White thinly applied with the damp rag. Take this colour over the trees and into the sky area. It’s okay to cover the trees with this coat as you’ll be able to see the dark tone beneath and we will re-lay in more colour over the trees in a later stage. Once you’re ready, let this coat dry.

Squeeze out some Medium Yellow, Sap Green, Phthalo Blue and Brilliant Red. With these tones you can create a light green from Medium Yellow and Sap Green, an olive green from Sap Green and a touch of Brilliant Red, and a dark green from Phthalo Blue and Sap Green. Also, use straight Sap Green. This will give you four green tones to use for the leaves.
Lay the leaves in individually with the angle brush on its side. Create the leaves emitting out from the branches. Build the leaves up and don’t clean the brush between using the different greens. This mixing of colours will add more interest to the leaves by creating new green tones.
Keep the circular flow of the painting in mind as you paint the leaves. Creating a painting in this style takes a little time, so try to think of it as a mindful exercise as you build up the colour on the painting.

Once the leaves are all painted on, you can start on the foreground. Squeeze out some Raw sienna, Titanium White, and some Burnt Umber, and begin by laying strokes over the ground area.
Apply the strokes at a horizontal angle and lay them next to each other at a slightly different angle to give a wavy look.

The sun in this painting is directly above the trees, so there will be shadows cast from the trees. You can refer to the image of the finished painting as a guide. Roughly suggest the shadow areas by laying in the strokes at similar angles but use the green tones you used on the tree and leaves. Mix in some more Titanium White to create a light, pastel green for highlights.

Next, mix Phthalo Blue with a touch of Titanium white and repaint the trees. When you paint this colour on the trees, let some of the black show through on the edge of the trees like an outline. Use straight Phthalo Blue for any areas of shadow and Phthalo mixed with Titanium White for areas of highlight, such as the top of the branches.

To paint the sky, squeeze out some Titanium White, Medium Yellow, Monastral Green, Cerulean Blue, Deep Cyan and Phthalo Blue. Begin by laying in yellow strokes into the middle of the sky. Continue to lay in the yellow strokes in a circular shape around the first strokes. To create a stroke, the brush tip can be dipped into the paint and the flat tip can be pressed onto the canvas.

After the yellow, lay in Monastral Green tinted with Titanium White, then straight Titanium White. Follow this with Cerulean Blue tinted with Titanium white, then Deep Cyan followed by Phthalo Blue. Keep in mind the circular pattern as you paint.


We can't wait to see what you come up with, so #montmarteart or tag us on Instagram or Facebook @montmarteart!
Material List
- Double Thick Studio Canvas Pine Frame 50.8 x 60.9cm (20 x 24in)
- Artist Brush Premium Taklon Angle 16
- Palette Knife No.6
- Acrylic Colour Paint Set Signature 24pc x 36ml (1.2 US fl.oz)
- Tear-off Paper Palette Signature 50gsm 36 Sheet


