


Portraiture is a thoughtful way to capture someone’s essence, quirks, and personality – but it can also feel a little intimidating when you’re just starting out. Don’t worry, though! We’ve got your back with answers to some of the most common questions about drawing and painting portraits.
1. What’s an easy portrait reference?

Honestly, you can’t go wrong with yourself as the subject! Self-portraits are perfect for practice because, let’s face it, you’re always around. Plus, no one’s going to complain if their nose ends up looking a little wonky.
If staring at yourself in the mirror feels a bit too intense, try snapping a quick photo to work from. Need some inspo to get started? Check out these 8 self-portrait ideas for some out-of-the-box ideas.
2. How to paint realistic skin tones?

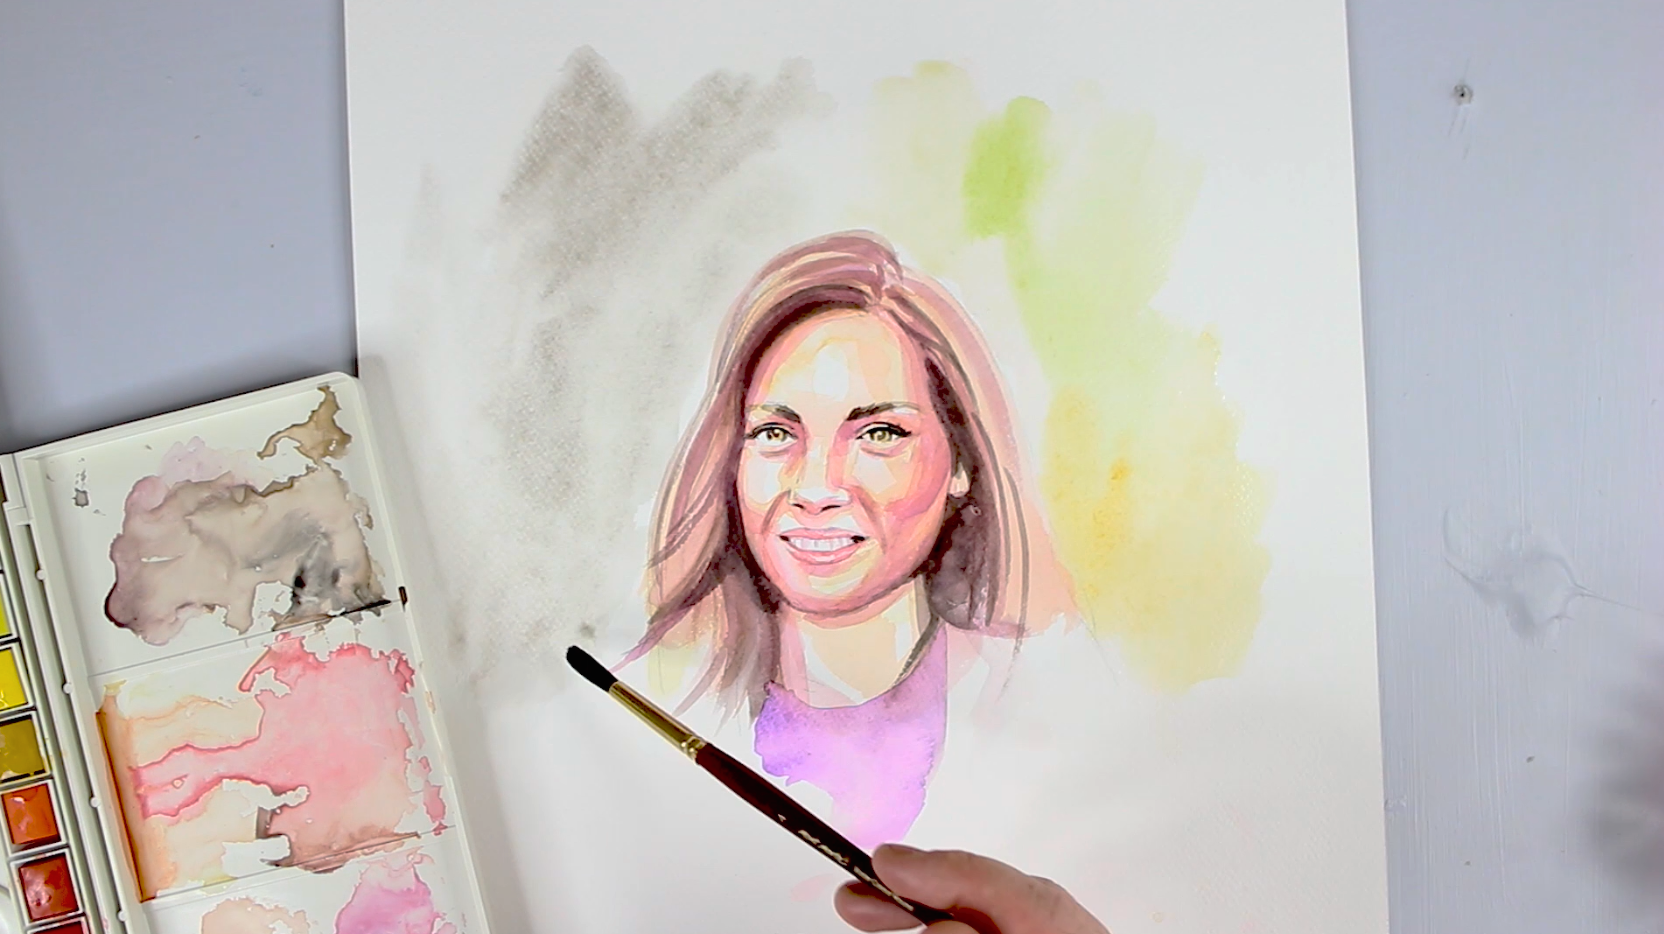
Mixing skin tones can feel like alchemy, but it’s actually pretty straightforward once you get the hang of it. Start with the basics: red, yellow, and blue. Mix red and yellow for a warm orange base, then sneak in a teeny bit of blue to tone it down. For lighter tones, add white, and for darker tones, deepen the mix with burnt umber or more blue.
Here’s where it gets fun: skin isn’t just “peach” or “brown” – it has undertones! Look closely at your subject. Do they have a rosy glow (add a smidge of crimson) or more olive hues (try a touch of green)? Experiment on scrap paper until you find the right balance. And remember, it’s better to layer gradually than slap it all on at once – no one likes a patchy complexion, even in paint.
Lastly, don’t forget that you have creative licence as an artist. You might want to take an abstract approach and pick out a fluoro palette or make your subject look scared and sickly by dulling their complexion. It’s totally up to you and your vision!
3. How to paint a portrait background?

Think of your background as the hype crew for your subject – it shouldn’t steal the spotlight but can definitely add some flair. Muted backgrounds are a classic choice and super easy to pull off. All you need to do is tone down your base colour by mixing in a bit of its complementary colour (like adding green to red or blue to orange). It instantly softens the shade and gives it a more neutral, understated vibe.
If you want a subtle gradient, blend your base colour with white to create a lighter tone, then work your brush in smooth strokes across your art surface for a faded effect. Or, for a little texture, try dabbing on paint with a sponge. Just keep things simple and don’t get bogged down with details – you want your subject to stay the star of the show.
4. Any tips on capturing likenesses for realistic portraits?

Ah, the million-dollar question! Capturing someone’s likeness is all about spotting the unique features that make them, them. Start with a basic sketch to map out their facial proportions. For example, the eyes are usually halfway down the face, and the space between them is about the width of one eye.
Then, zero in on the details: the sharpness of their jawline, the tilt of their nose, or that one eyebrow that always seems a little more dramatic. Don’t forget the eyes – they’re said to be the window to the soul. Even a subtle tweak to the shape or angle can totally transform how similar your portrait looks to the real deal.
Aside from practising, ask around and see what features people notice about your subject. Honing in on these areas may help balance your portrait and make it more recognisable. You can also try a few techniques like gridding to keep proportions accurate – all you have to do is draw a grid on your reference pic and your canvas, keeping the scale the same. This way, you can isolate your portrait into bite-sized chunks! Check out our How to Paint a Self Portrait project to see this technique in action.
5. How do I draw expressions?

An expression isn’t just about the smile (though that’s important too!). It’s the way the head tilts, how the eyes crinkle, and even the tension in the lips. Think about the eyebrows and the creases they create when they furrow, raise, or lower when you’re feeling different emotions. Give yourself extra time to work on the eyes and mouth – tiny changes to these areas have ripple effects when it comes to capturing the emotional state of your subject!
Want to take things up a notch? Play around with colour. A touch of warmth in the cheeks or cool shadows under the eyes can completely change the mood and narrative created by your painting. Don’t be afraid to exaggerate some elements – portraits are all about bringing your subject’s personality to life.
6. How do you paint hair?

Painting hair can feel like trying to draw a million tiny strands – but here’s a secret: don’t even bother! Focus on the overall shape and flow instead. Take note of sections that curve as light bounces off the strands where they bend. As you apply your base hair colour to the main areas, leave the centre of the curves blank so you can highlight them with a lighter colour. Layer your highlights and shadows over the base colour, connecting them to make smooth gradients and realistic shine.
Use a small round brush for adding finer details, but keep your strokes loose and varied. Remember, hair isn’t one solid colour. Add a mix of tones for dimension – it’ll make the hair look way more lifelike (and way less like a wig).
7. How do I add depth and dimension to my portraits?

Depth is all about light and shadow. Start by looking closely at how light hits your subject – where are the highlights, and where do the shadows fall? Use lighter tones to highlight areas that protrude and therefore are hit by more light (e.g., the bridge of the nose, cheekbones, and forehead). For shadows, go darker around the jawline, under the nose, and along the hairline – these areas are somewhat recessed.
Blend like your life depends on it – harsh lines can flatten a portrait faster than you can say "two-dimensional." This can be a really cool artistic choice for a more stylised look, but if you’re going for realism it’s best to make your subject’s features feel more 3D. A tip for checking in on the depth of your painting is to step back and squint. This can help you see the highlights and shadows as a collective without getting stuck in the details. Once you’ve checked up on the tonal values, jump back into painting and blend or sharpen areas as needed.
8. I find portrait painting boring… help?!

Portraiture doesn’t have to be about rules, realism, and accuracy. Try experimenting with different styles and techniques! For a creative twist, check out this surrealist-inspired portrait tutorial. Playing with unexpected shapes or dreamlike elements can breathe new life into your work and keep you from feeling stuck – or worse – uninspired.
Now you know a little more about portrait painting techniques and tips, you’ll be ready to line up your next subject. Remember, practice makes progress – and don’t forget to have fun while you’re at it!
If you get creating, #montmarteart or tag us @montmarteart on Instagram or Facebook. We’re excited to see what you create!
For art ideas, explore our Projects and How-tos. If you’re looking for more answers to commonly asked questions, jump into our FAQs collection.
Stay up to date with the latest Mont Marte news, info, products, projects, and more by subscribing to Creative Connection down below. Simply enter your email to get loads of free art lessons and inspo sent straight to your inbox.