


If you want to DIY some cute jewellery, check out these tips for polymer clay earrings! From making seamless colour blends to adding cool textures, we’re here to give you a rundown on all things polymer clay.
1. Conditioning polymer clay

Before you start shaping your earrings, you need to condition your polymer clay to make it pliable and easy to work with. This means kneading and warming the clay until it’s soft and smooth.
There’s a few ways to do this, from rolling it between your hands to kneading it on a non-stick surface. You can also save your hands by running your clay through our Clay Press. Start at the widest setting and gradually reduce it as you roll the clay through, folding it each time. This not only softens the clay but also helps remove air bubbles, which can cause cracking when baked.
You may be tempted to skip conditioning but trust us when we say it makes a huge difference! The clay is easier to work with and much less likely to crack or change shape when baking.
2. Adding texture to polymer clay

Adding texture to your earrings is a simple but effective way to make them stand out. Plus, we have a hack for instant, intricate indentations – our Textured Clay Rollers!
Just roll the textured roller gently over your clay before cutting it into earring shapes. We have a lace-like design and swirl design in acrylic roller form, as well as four unique patterns that come with our Polymer Clay Roller Wheel.
You can also use lace fabric, crumpled foil, leaves, stamps, and more to press interesting designs into the clay. Or grab some clay tools and doodle designs into the clay with a sharp point – the sky’s the limit!
3. Silicone moulds for polymer clay

Shaping polymer clay by hand is a great way to make unique earrings but sometimes you want to be able to make the same design over and over. Meet our Double Sided Polymer Clay Press Moulds (try saying that ten times fast)! These are great for quickly creating symmetrical, consistent shapes with precision.
Simply place your conditioned clay into the mould, press, cut away the excess clay, and pop out a botanical shaped design. They come with detailed patterns so you can have the effect of precise linework without caving by hand. You can even layer different colours in the mould for a multi-dimensional effect!
4. Polymer clay blending

Polymer clay is ideal for experimenting with colour blends. If you want a marbled effect, twist two or more colours together and then roll them out, folding and re-rolling until you achieve your desired look.
For a gradient (or ombré) effect, roll out two colours into thin sheets and stack them slightly overlapping. While you can absolutely use a roller, we recommend using the Clay Press to blend them gradually – running them through multiple times will create a smooth, seamless transition. This technique works great for soft pastel looks (like for flower petals) or bold, sunset-inspired colour blends.
5. How to smooth polymer clay

Rough edges can make handmade earrings look a little unfinished (unless that’s the style you’re chasing!). After cutting out your shapes, gently smooth the edges using your fingertips or a clay modelling tool with blunt edges. You can also grab a cotton tip and some acetone to remove any fine lines or fingerprints – see how in our tutorial video!
If you have any edges that still look or feel rough after baking, use fine-grit sandpaper to buff them for a polished look. Plus, good news – the acetone trick works on cured clay as well, so try it out for those pesky fingerprints that we always seem to find after baking!
6. Baking polymer clay

Baking is where a lot of polymer clay creations can go a little awry! Each brand of polymer clay has a recommended method, so be sure to check the packaging for a temperature and time guide based on your clay thickness. For Mont Marte polymer, we suggest:
1. Preheat your oven to 120-130°C (248-266°F)
2. Place your clay pieces on baking paper, ceramic tile, or something that separates them from direct contact with the metal tray to prevent shiny spots
3. Bake for 30 minutes for every 6mm of clay thickness
4. For extra durability, let your earrings cool completely before handling
5. If in doubt, do a test run!
Tip: If you need to rebake (for adding additional details or layers), always bake in short intervals to avoid scorching the clay.
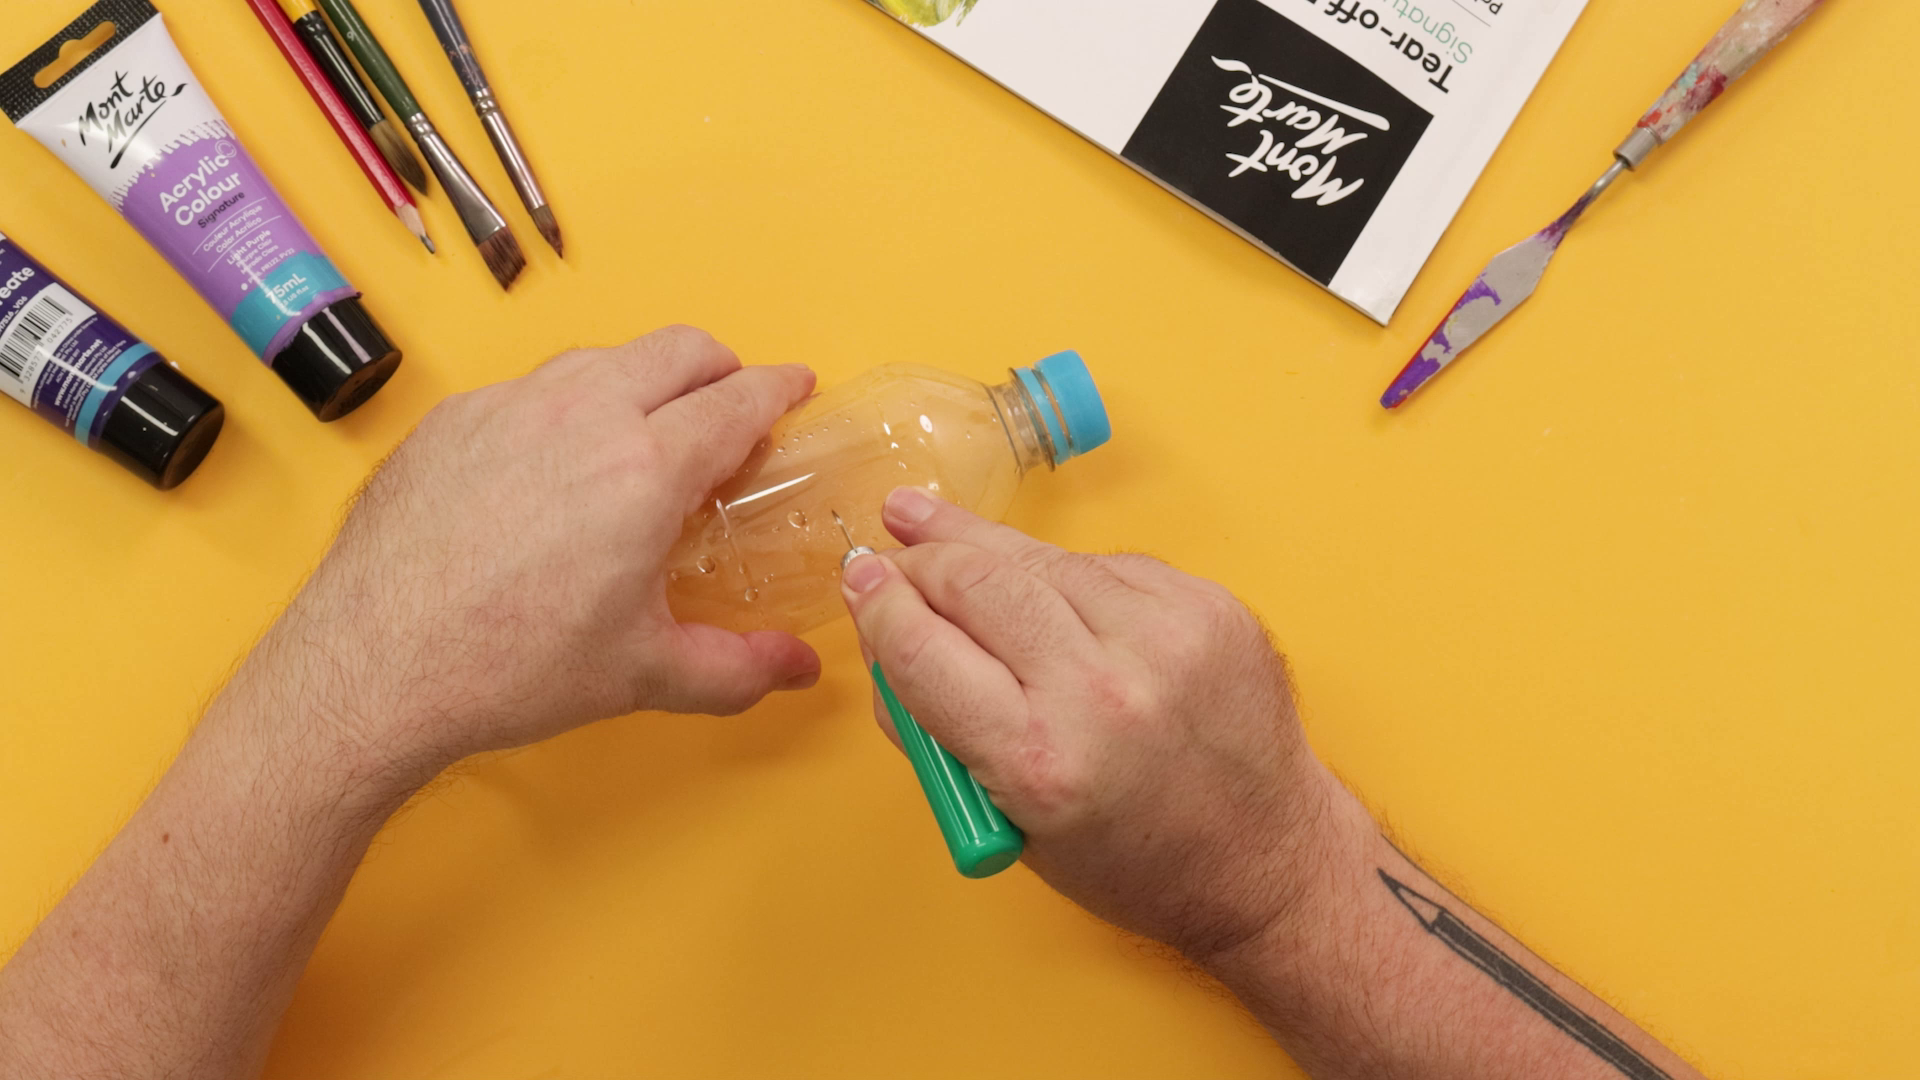
7. Drilling holes in polymer clay earrings

It’s up to you whether you want to add earring holes before or after baking, there’s no right answer.
If you pierce the holes before baking, use a toothpick or needle tool to create a neat opening. Be sure to keep your tool straight so the hole is clean and even.
If you prefer a sleeker, more professional finish, you can drill holes after baking with a fine, narrow drill bit. This technique allows for more precision and ensures the holes are crisp and consistent across your pieces. Whichever method you choose, make sure the hole is large enough for your jump rings or earring hoops.
8. Tools we recommend!

Using the right tools can make a huge difference to the different affects you can create. Here are a few Mont Marte essentials we recommend keeping in your kit:
- Flexible Clay Knives – Ideal for cutting sharp, clean edges and slicing curved designs.
- Sculpture Tool Set – All-in-one set with ball stylus tools, modelling tools, and sharp tools for precision lines.
- Levelling Roller or Clay Press – Helps flatten clay to a uniform thickness before cutting, so your earrings are the same depth.
- Polymer Clay Extruder – Turns your clay into consistent tubes of shaped clay for precise linework, borders, and more.
Investing in good tools will help keep your process simple and your designs looking polished!
9. Assembly time

Now that your polymer clay pieces are baked and ready, it’s time to turn them into earrings. Here are a few tips for pro-level assembly:
- Use jump rings to connect pieces—open them sideways rather than pulling them apart to maintain their shape.
- Choose quality earring hooks and posts to ensure durability and comfort. Stainless steel or hypoallergenic materials are great options for sensitive ears.
- For stud earrings, attach the posts with strong adhesive or embed them into the clay before baking for a seamless finish.
10. Storing your earrings

Polymer clay is durable, but proper care will keep your earrings looking fresh. Store them in a cool, dry place, and avoid prolonged exposure to direct sunlight (especially for lighter colours).
If they get dirty, wipe them gently with a damp cloth or a cotton pad with a little rubbing alcohol—this works well for removing fingerprints or marks.
Making polymer clay earrings is a great way to explore creativity while crafting stylish, wearable art. So, grab your clay, experiment with these tricks, and let your imagination run wild—your next favourite pair of earrings is just a roll, press, or bake away!
If you do get crafty with polymer, let us know by tagging us on Instagram or Facebook @montmarteart or use #montmarteart to show us what you come up with.
To stay up-to-date with the latest projects, inspo, tips, and tricks, join our Creative Connection community by signing up down below.