If you've ever wondered how to sculpt plaster, we’re here to walk you through 5 basic techniques. These methods are beginner-friendly, so you have a solid foundation to start exploring plaster art! Grab your apron, gloves, and let's get sculpting.
Using Plaster of Paris
Plaster of Paris is the bread and butter of plaster sculpture. It's easy to work with, sets quickly, and is great for creating base structures to intricate details. To get started, all you need is some Plaster of Paris powder and water!
WARNING: Do not submerge your hands into Plaster of Paris mixtures, as the chemical curing process raises the temperature to 60°C+ and can cause burns. Wear gloves and keep your hands from being encased by the mixture at all times.
How to use Plaster of Paris:
For most sculptures, you’ll want to mix approx. 2 parts Plaster of Paris with 1 part water. You can adjust the ratio a little until your mixture is smooth and looks like the consistency of pancake batter. Be careful not to over stir when combining the powder and water, as you want to avoid creating bubbles where possible.
If you have a mould on hand, pour the plaster mixture in and gently tap the mold to release any air bubbles. Allow the plaster to partially set for around 20-30 minutes, until it feels dry to the touch but not completely solid. The goal here is to wait until it’s just set enough to remove from the mould, so it can finish drying in the open air.
Once partially set, carefully remove your sculpture from the mould and leave dry for about a day before painting or finishing. If you don’t have a mould on hand to use, no worries, we’ve got techniques below so you can DIY your own or try sculpting without one.
Plaster carving
Plaster carving is a great technique for sculpting intricate designs and patterns directly into a block of plaster. It's a bit like carving wood or stone but with a softer material that's more forgiving for beginners (and for your hands!). It’s similar to working with soft Air Hardening Clay; just use tools to create your sculpture shape from one big block.
How to carve Plaster of Paris:
Start by pouring your Plaster of Paris mixture into a non-stick container, such as a silicone baking mould, or a container primed with release agent. Allow your plaster to partially set until it’s cured enough to remove from the container, but still soft enough to carve.
Once the block is free from the mould, use Sculpture and Pottery Tools like chisels, knives, or even toothpicks to carefully carve away the excess plaster and create your design. Start by pairing back the plaster to create the rough shape of your sculpture. Once the basic form is in place, use finer tools to create the details and linework.
Take your time and work slowly, especially if you're carving small areas or delicate patterns. Once you're happy with your carving, let the plaster fully harden over 24hrs before adding finishing touches like paint or varnish.
Plaster relief sculpture
Relief sculpture is a technique where you use Modelling Clay or another impressionable, non-porous material to create a relief and fill it with plaster. We’ve got a project video dedicated to making a relief using our Modelling Clay, the underside of a Canvas, and Plaster of Paris. Click here to see more and read below for instructions!
How to make a plaster relief sculpture:
Start by finding a surface with edges, like the back of a canvas or a container. Grab your Modelling Clay and line the bottom of the canvas or container. Make sure the clay is packed tightly without cracks, so your plaster can be poured on top without leaking through.
Use sculpting tools to create your desired relief design, pushing into the clay to form indentations, linework, and shapes. You may want to press objects into the plaster such as gems or toys to get an impression of their shape. Make sure you remove them before adding plaster!
Use a release agent like hand soap to prime the canvas’ timber frame or the sides of your container. Mix up Plaster of Paris and water until you reach that ideal pancake batter consistency and pour it into the relief mould. Level the top and make sure the mix fills your mould evenly. Let the plaster dry completely by leaving overnight, before removing from the mould. Finish by painting or varnishing your design!
Plaster cast statue
Creating a plaster cast statue involves making a mould of a three-dimensional object, creating a cast of that mould, and then pouring plaster into the cast mould to create a replica. It's a great technique for making lots of the same type of sculpture, so you can make a bunch of identical handmade prezzies, décor, and more!
Making a mould for Plaster of Paris:
Start by making a master sculpture, which will be the shape that you cast. We’ve got a detailed video about casting, where we sculpt and cast an owl. Click here for a close look of the full process! We use silicone as the base for our casting mould, but you could also explore using rubber or alginate.
Make your master sculpture using Air Dry Clay secured to an armature. Once dry, seal it with acrylic paint and leave to dry once more. Next, build a mould wall using Modelling Clay around the perimeter of the sculpture, about 3cm wide and 6cm tall. Watch the video above to see what this looks like!
Apply a release agent to one side of your sculpture once the mould wall is secured (we used petroleum jelly and white spirits). Apply silicone to the primed side and indent registration lugs into the mould wall (these will make the two halves of your mould fit snugly). Cover the silicone in a thick coat of Plaster of Paris, smoothing as you go.
Once dry, remove the mould wall and repeat the silicone and plastering process on the other side of your sculpture. When it’s partially dry, shave away the plaster until you can see the join line where the two sides meet, and separate to reveal your casting mould and master sculpture. Leave to set for a day before using.
Create a cast by binding the two halves together with rope or a belt and pouring plaster into the hole at the bottom. Leave to dry until you can remove the sculpture, and then allow it to cure overnight. Paint and decorate!
Plaster gauze sculpture
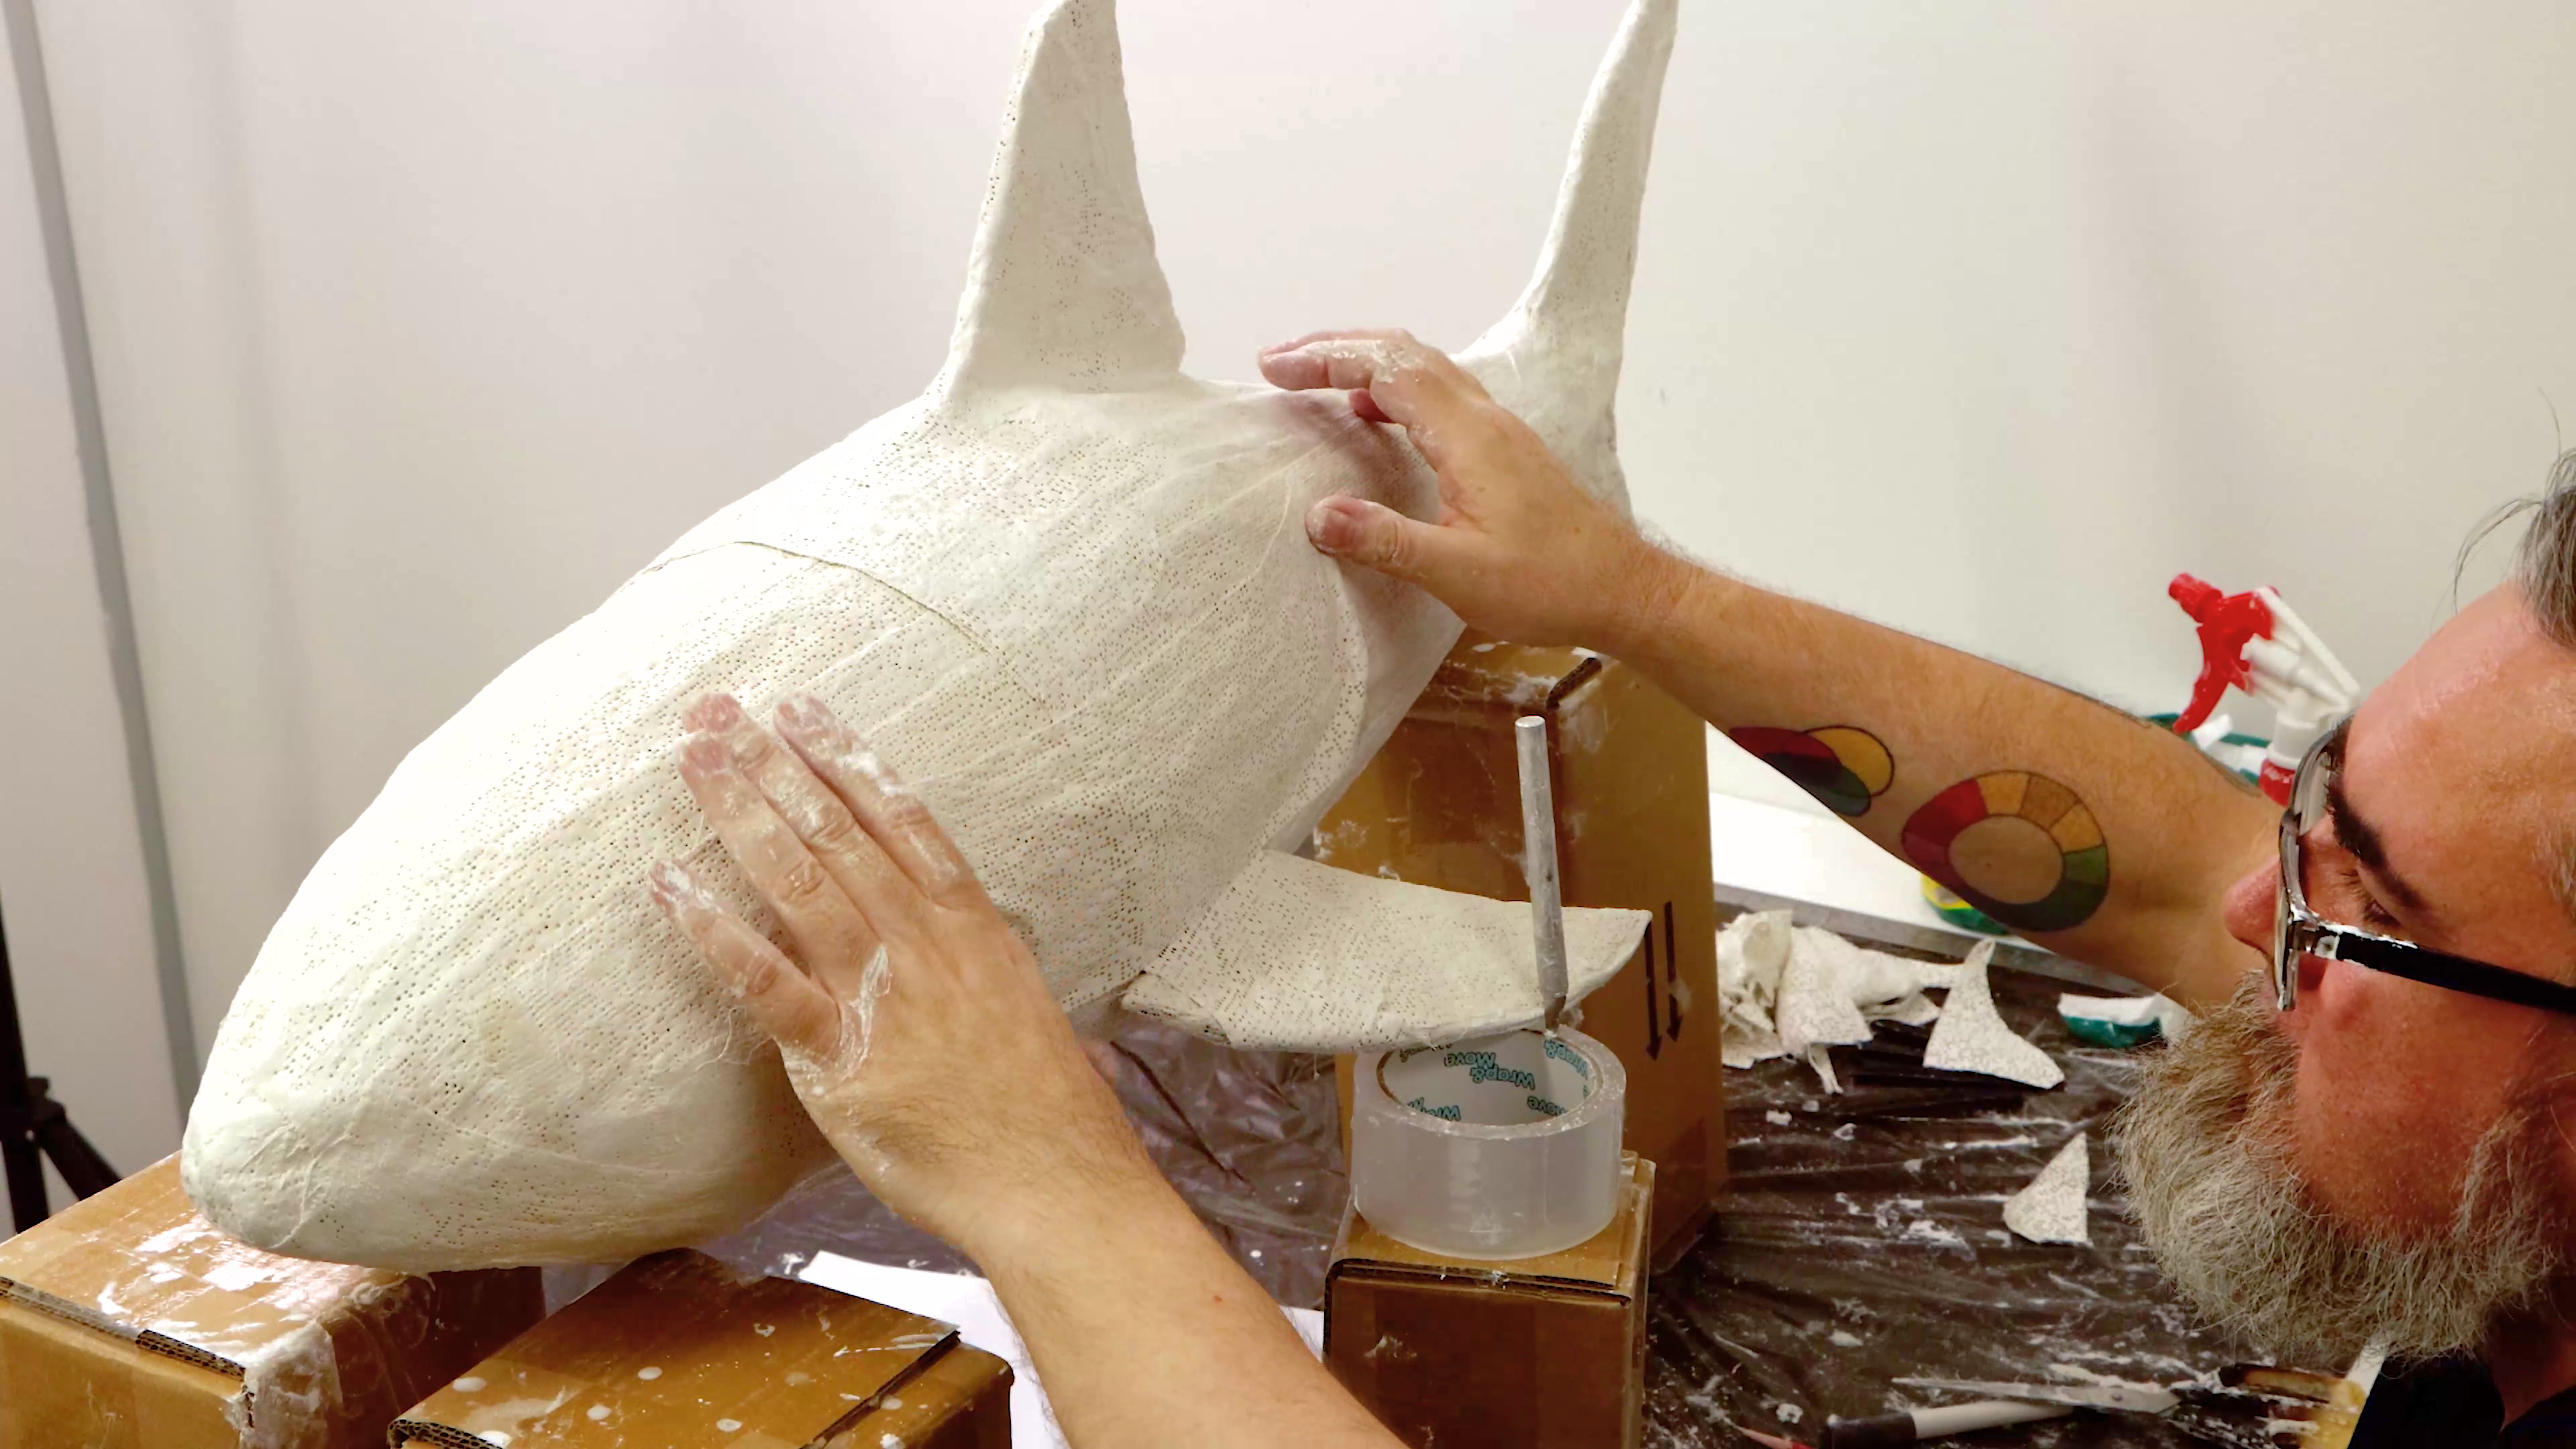
Plaster Cloth Wrap is a handy material that's easy to work with and great for creating and securing sculptural forms. It's essentially strips of gauze infused with plaster that you can mould and shape by adhering to wire frames, cores, models, or existing sculptures.
How to use plaster cloth:
Start by dipping strips of plaster gauze into water and then applying them to a wire armature or other supportive structure. You may want to use the wrap alongside clay to fortify your sculpture!
Layer the plaster gauze strips until you've built up the desired form and support. Use your hands or sculpting tools to refine and shape the plaster as it begins to harden. Once the wrap is fully set, you can sand, carve, or paint it to add detail and texture. You can also add other clays on top to build up the existing form. The end result is up to you!
Now you know these 5 handy techniques, you’re ready to tackle plaster sculpting! Just pick up some Plaster of Paris, Plaster Cloth Wrap, and maybe some other clays to kick start your journey.
If you feel inspired to make something, #montmarteart or tag us @montmarteart on Instagram or Facebook. We’d love to see what you come up with!
Check out our tips and techniques page for loads more ideas and inspo. To stay up to date with our latest products, art lessons, how-tos, hacks, and more, subscribe to Creative Connection by entering your email down below.


