If you’ve torn an artwork, don’t stress. These things happen and the good news is that we have an easy trick to help you fix it! All you need is some spare canvas and a couple of tools to patch it up.
Step 1. Measure the tear

First things first, you’re going to need to measure the tear in your canvas. This will help you to cut the right size for your patch in the next step.
Step 2. Trace a rounded rectangle onto some spare canvas

Use a pencil to trace a rectangle with rounded corners onto some spare canvas (give approximately 2cm of space around all sides of the tear size). Why the rounded corners? These are less likely to lift in the future, so they’ll keep your patch nice and tidy.
Step 3. Cut a patch of canvas

Get out your hobby knife and trace around the rectangle that you’ve drawn on the spare canvas. Remember to lay down some newspaper or a cutting mat to protect your table.
Step 4. Lay the patch on the back of the tear and trace around it

Line up the patch with the tear on the back of your artwork and trace around it with a pencil.
Step 5. Apply craft glue

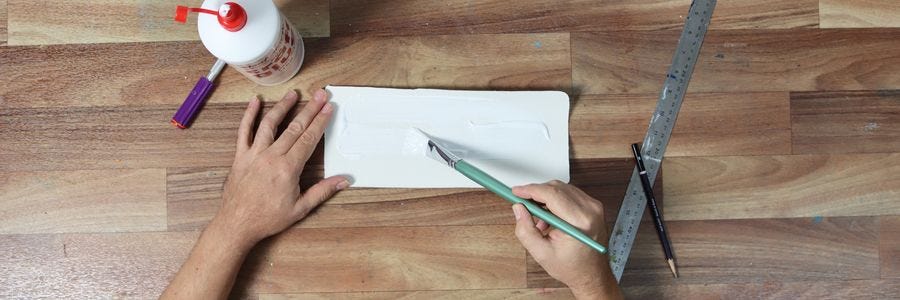
Use a flat brush to apply an even coat of craft glue to both the patch and the back of your artwork (paint inside the area you traced in step 4).
Step 6: Stick the patch onto the back of the tear

Line up your patch with the wet glue on the back of your artwork and press it down firmly. Lay some baking paper on top and stack up a few books to weigh down the patch and keep it smooth.
Step 7. Let it dry

Leave it to dry for 48 hours with the books stacked on top.
Step 8. Reapply paint over the damaged area

Now that your patch is dry, you can paint over the tear on the front of your artwork. You’ll need to match your colours as closely as possible and apply the paint thicker to the damaged area to even out the surface.
While some tears can be trickier to fix than others, we hope that this guide has your artwork looking good as new.


